
The first try worked reasonably well but I didn't allow enough for how much initial stretch the original garment had so I needed to add a rectangular patch in the crotch area. Now I have a constructed example I will modify the pattern and upload a copy here in a few days.
This pattern is made up of 4 parts and sized for a 36in waist. The front pouch, side panels and the rear section. I went with this design as I personally don't like seams which go up the centre of the front pouch.
Start with the front pouch and glue both of the side panels working from the top downwards as always. Now you can wrap the glued latex round your waist and offer up the rear panel to make sure it will fit. If its too tight or loose you can adjust the back panel to make it fit.
Next put the trunks on and mark where you wish to glue the crotch area. You have a few choices here. If you have a longer crotch you can cut the sides back and turn them more into briefs while if you have a short crotch area they are pulled down more giving a longer leg area. Use a wide seam in the crotch area as it will get some stress.
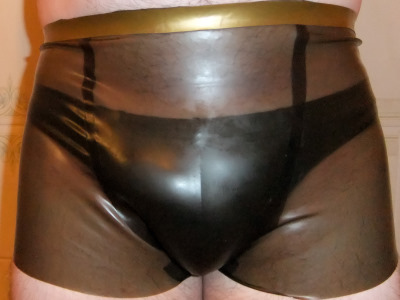
When its been cut and glued put them back on again and mark where you wish to cut the waistline. Mark it front and back and don't just mark the front and cut it square. Due to the latex stretching more at the back, the back will tend to be pulled down more. You will want to add some reinforcement at the top by adding a band as in the picture above. The crotch area should have quite a wide seam so that will be fine. The rear has two seams rather than a central seam. That's good as a central seam would have a lot of force pulling it apart when you sit down
You should now have a nice pair of trunks. I will probably make another pair. I only had 0.3mm latex which is good for the front pouch but you are better of with something thicker for the other panels as it is very prone to curling.
![]()
 Download Pattern